The ability to deploy new features and fixes rapidly and reliably is a significant advantage. Continuous Deployment (CD) plays a crucial role in this context by automating the deployment process, ensuring that code changes are pushed to production or staging environments after successfully passing quality checks. This level of automation not only accelerates the development cycle but it also diminishes the likelihood of errors making it to production. Combining Continuous Integration and Continuous Deployment together makes for a powerful combination for companies and teams of all sizes.
For those working with Go, a language celebrated for its simplicity and performance, incorporating Continuous Deployment into our workflows can substantially boost both productivity and the reliability of our applications. GitHub Actions, an integral automation tool within GitHub, provides a straightforward pathway to implement CD pipelines directly within our repositories, eliminating the need for external services.
Following the themes of my previous articles Continuous Integration with Go and GitHub Actions and GitHub Actions and Go Private Modules, this article aims to guide software engineers, GitHub Actions users, and Go developers through the process of setting up a Continuous Deployment pipeline. I've written this guide to help you with the knowledge and tools necessary to automate your deployment process, making your development cycle more efficient, secure, and swift.
Through my journey in software engineering, I've had the opportunity to implement Continuous Deployment using Go and GitHub Actions across multiple projects at various companies. This experience has proven invaluable, not only in streamlining development processes but also in enhancing team collaboration and developer productivity. Sharing these insights, I hope to help others in leveraguing the full potential of CD in their Go projects.
Let's dive into Continuous Deployment with Go and GitHub Actions, exploring the benefits, strategies, and best practices.
Understanding Continuous Deployment
Continuous Deployment (CD) is a software release process that automates the delivery of code changes to production environments after passing predefined tests and quality checks. This automation ensures that software can be released to users quickly and reliably, making CD a cornerstone of modern DevOps practices.
What is Continuous Deployment?
At its core, Continuous Deployment automates the steps a code change must go through from being deployed in a production environment. Unlike Continuous Integration (CI), which focuses on the integration and unit testing phases, CD takes automation a step further. It ensures that code changes passing all automated tests are deployed directly to the production environment without manual intervention. However, it's important to note that this automation does not mean a lack of control. Many companies and teams implement protection rules within their CD pipelines, especially for critical environments like production. These rules can require manual approvals before a deployment is allowed to proceed. This hybrid approach allows developers to focus more on development while still providing a safety net, significantly reducing the time and effort required for manual deployments, yet ensuring that critical checks and balances are in place.
Benefits of Continuous Deployment with Go
Implementing Continuous Deployment for Go projects offers several advantages:
- Speed and Efficiency: Automating the deployment process reduces the time from code commit to production deployment, enabling faster feedback and iteration cycles.
- Reliability: Automating deployments reduces the chances of human error. Automated tests ensure that the system deploys only high-quality code to production.
- Improved Productivity: Developers can concentrate on writing code and improving the product without being bogged down by the operational aspects of deployment.
- Enhanced Collaboration: Teams can work more efficiently by relying on a consistent and transparent deployment process, fostering a culture of trust and collaboration.
Continuous Deployment vs. Continuous Integration
Continuous Integration (CI) and Continuous Deployment (CD) serve distinct roles in software development. CI focuses on integrating code into a shared repository frequently, where it automatically builds and tests. This process aims to detect issues early. On the other hand, CD automates the deployment of code to production after passing all tests, ensuring users always access the latest features and fixes. While CI ensures code is always deployable, CD automates the deployment, making the process seamless
Prerequisites
In my previous article Continuous Integration with Go and GitHub Actions, we setup a Continuous Integration (CI) pipeline for a Go project using GitHub Actions. We'll build upon that knowledge and extend our CI pipeline to include Continuous Deployment (CD). If you haven't read the previous article, I recommend doing so to familiarise yourself with the basics of GitHub Actions and CI for Go projects.
To recap we setup a new Go project, added tests, and configured a GitHub Actions workflow to run our tests on every push to the repository. We'll use the same project and create a new workflow file to extend on our CI pipeline to include CD. To see the full setup, you can find the repository here.
Now we'll first start by changing our example project to include a simple web server. We'll then create a new workflow file to deploy our project to a staging environment.
In the repositories first pull request we added a simple web server to our project. This demonstrates the current continuous integration pipeline. You can view the pull request here.
Fly.io
For this article we'll be using Fly to deploy our project. Fly is a platform as a service that allows us to deploy our project close to our users. As a prerequisite we'll need to create a new Fly account and install the Fly CLI. You can find the installation instructions here. Once you have installed the Fly CLI and authenticated with your account you can start creating your applications. For our example we will need two applications, one for staging and one for production. This can be done by following the instructions here and creating a new application for each environment. Ensure you create a new configuration file for each environment.
For my example I have created two applications go-github-actions-example-staging and go-github-actions-example-production. I have also created two configuration files fly-staging.toml and fly-production.toml.
GitHub Environments
We'll also need to create two new environments in our GitHub repository. We can do this by navigating to the Environments tab in our repository settings. We'll create two new environments staging and production. We'll use these environments when deploying our project.

For the production environment we can add protection rules ensuring that only certain users can approve deployments to this environment.

For this simple example I have put myself as a required reviewer for the production environment.
Setting Up Your Continuous Deployment Pipeline
We will now explore creating a new GitHub Actions workflow file for our Continuous Deployment of our application. This workflow will be triggered by a push to the main branch and will deploy our project to a staging environment. We'll also copy the testing phases from our CI workflow into our CD workflow.
In a new file .github/workflows/deploy-staging.yml we'll add the following:
name: Deploy Staging
on:
  push:
    branches:
      - main

jobs:
  build:
    runs-on: ubuntu-latest
    environment: staging

    steps:
      - uses: actions/checkout@v4
      - name: Set up Go 1.21
        uses: actions/setup-go@v5
        with:
          go-version: 1.21

      - name: golangci-lint
        uses: golangci/golangci-lint-action@v3
        with:
          version: v1.54

      - name: Run Tests
        run: go test -v ./...

      - name: Build
        run: go build -v ./...
  deploy-staging:
    name: Deploy app to Staging
    runs-on: ubuntu-latest
    needs: build
    steps:
      - uses: actions/checkout@v4
      - uses: superfly/flyctl-actions/setup-flyctl@master
      - run: flyctl deploy --local-only --config fly-staging.toml
        env:
          FLY_API_TOKEN: ${{ secrets.FLY_API_TOKEN }}
In this workflow, we have two jobs. The first job build runs our tests and builds our project. It's important to note that we've copied the testing phases from our CI workflow into our CD workflow. This ensures that our project is tested before it's deployed to a our environments. Given more time we could refactor this into a reusable action to avoid duplication. The second job deploy-staging deploys our project to a staging environment using Fly. We use the superfly/flyctl-actions/setup-flyctl action to setup Fly and then use the flyctl deploy command to deploy our project. We pass the FLY_API_TOKEN secret to authenticate with Fly.
Something to note with the flyctl command is that we are giving it the --local-only flag. This flag tells the flyctl command to perform builds locally using the local docker daemon. The default is builds are built on remote hosts. This is useful for our GitHub Actions workflow as we don't need to worry about setting up a docker daemon on our runners.
Now when we push to the main branch, our project will run the Continuous Integration and Continuous Deployment pipelines. Running both at this point is perhaps not ideal, but it's a good starting point.
Now we have staging deployments up and running, we can look at deploying to production. But before we do that, we need to first create releases for our project.
GitHub Releases
GitHub Releases are a great way to package software releases. They provide a way to package software, release notes, and links to the software's assets. We can use GitHub Releases to create a release for our project and then deploy that release to production.
In this example we'll create releases using the GitHub user interface. We'll then use the release tag to deploy our project to production. A future improvement could be to automate this process using GitHub Actions.

To create a release, navigate to the releases page by clicking on the Releases header in the right hand side of your repository home. For the first release, click on Create a new release.

From this page we need to create our release tag, title, and description. We could also add assets to our release but for this usecase we won't. When it comes to the title I usually keep this the same as the release tag. The description is a good place to list the changes in this release, GitHub has the ability to autogenerate this for you based on the commits included in the release.
For my first release I created a v0.1.0 release.
Once you've created your release, you'll be able to see it on the releases page. However we won't be able to use it to deploy to production just yet. We first need to add a new workflow to our project to deploy to production.
In a new file .github/workflows/deploy-production.yml we'll add the following:
name: Deploy Production
on:
  push:
    tags:
      - v*

jobs:
  build:
    runs-on: ubuntu-latest
    environment: production

    steps:
      - uses: actions/checkout@v4
      - name: Set up Go 1.21
        uses: actions/setup-go@v5
        with:
          go-version: 1.21

      - name: golangci-lint
        uses: golangci/golangci-lint-action@v3
        with:
          version: v1.54

      - name: Run Tests
        run: go test -v ./...

      - name: Build
        run: go build -v ./...
  deploy-production:
    name: Deploy app to Production
    runs-on: ubuntu-latest
    needs: build
    steps:
      - uses: actions/checkout@v4
      - uses: superfly/flyctl-actions/setup-flyctl@master
      - run: flyctl deploy --local-only --config fly-production.toml
        env:
          FLY_API_TOKEN: ${{ secrets.FLY_API_TOKEN }}
What you will notice for this new workflow is that it's very similar to the staging deployment workflow. The main difference is that it's triggered by a tag push and it deploys to a production environment. In this example we're using the v* pattern to match any tag that starts with v. This is a common pattern for version tags.
Now that we have our production deployment workflow, we can use GitHub Releases to deploy our project to production. To do this we need to create a new release and tag it.
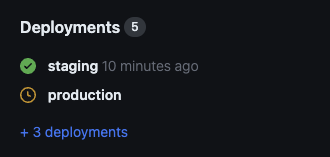
Now after we've tagged our next release, we can see in our list of Deployments that we have a new production deployment waiting to be approved.
Heading to the Actions tab we can select our Deploy Production workflow and see that it's waiting for approval before it can proceed.

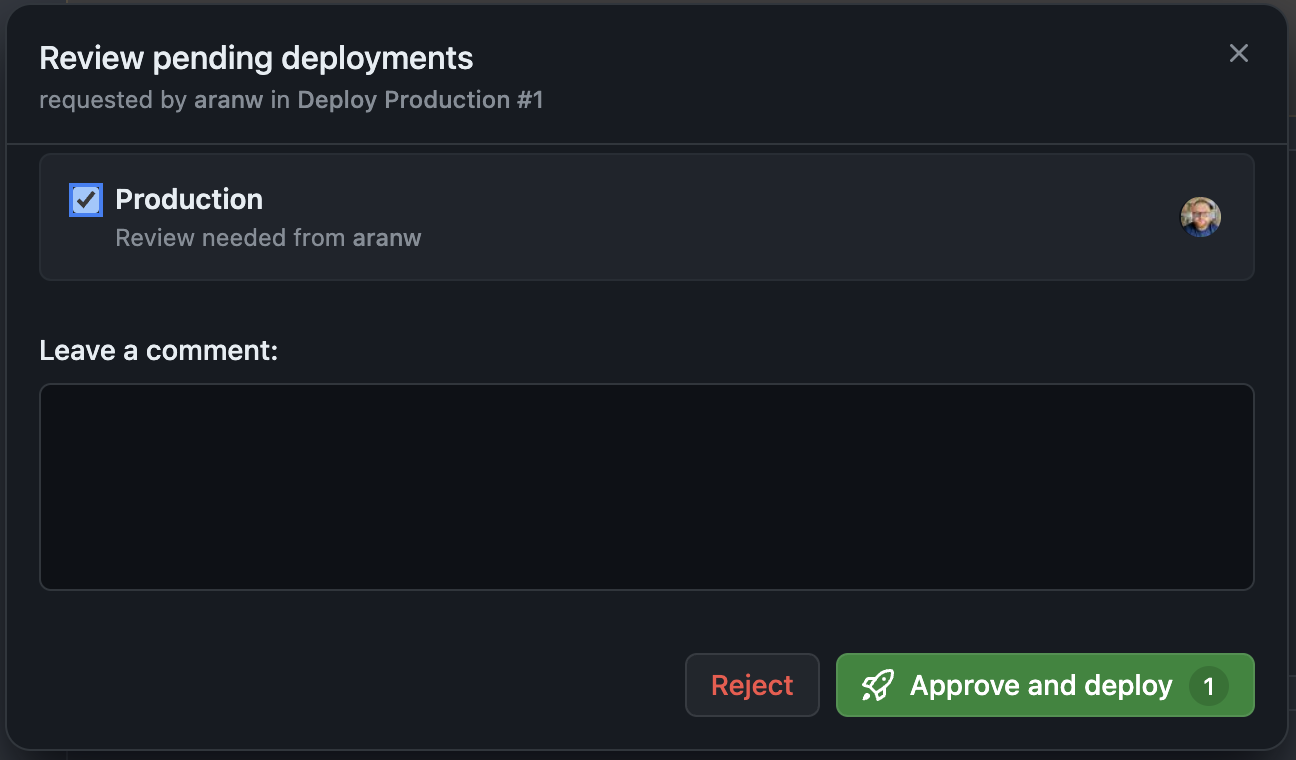
Clicking on the Review deployments will open a Review Deployment modal where we can approve the deployment and add an optional comment.
Once our deployment has been approved and our workflow has completed we can see that our project has been deployed to production.

Conclusion
In this article we've explored the benefits of Continuous Deployment and how we can implement it for our Go projects using GitHub Actions. We've also looked at how we can use GitHub Releases to deploy our project to production.
Implementing Continuous Deployment alongside Continuous Integration can significantly improve the speed, reliability, and efficiency of your development process and the quality of your software. By automating the deployment process, you can improve the iteration cycle and reduce the likelihood of errors making it to production. Along with ensuring deployments are regular and reliable, Continuous Deployment fosters a culture of trust and collaboration within your team.
There are still various improvements and changes we could make to our deployment process. For example, we could automate the creation of releases using a tool like, we could also test and build our application in one job to avoid duplication.
Exploring the benefits of Continuous Deployment and its implementation for Go projects using GitHub Actions has illuminated a pathway to enhancing software delivery. The integration with GitHub Releases for deploying projects to production further amplifies the efficacy of this approach.
By embracing Continuous Deployment in tandem with Continuous Integration, the development process can achieve remarkable gains in speed, reliability, and efficiency, concurrently elevating the quality of software. Automation of the deployment process not only streamlines the iteration cycle but also significantly diminishes the chances of errors reaching production. Moreover, the adoption of Continuous Deployment cultivates a culture imbued with trust and collaboration within teams.
Looking ahead, there are several avenues for augmenting our deployment processes:
- Automating release creation: Leveraging tools like release-please can streamline the release process, ensuring that new versions are systematically prepared and documented.
- Optimising job configurations: Consolidating testing and building phases into a single job could reduce redundancy, enhancing the efficiency of our Continuous Integration/Continuous Deployment (CI/CD) pipeline.
These enhancements not only promise to refine the deployment process but also position our projects for greater adaptability and success in the evolving landscape of software development.